How to implement Serverless Server-Side Rendering in React
In this tutorial, we are going to learn about Server-Side Rendering in React Apps Using Serverless framework and Aws Lambda.
Note: If you stuck anywhere in this tutorial then please checkout code respository on github.
What is Server Side Rendering?
Server-Side Rendering or Isomorphic or Universal Javascript means running the JavaScript from the both client side and server side. In Single Page Apps it takes a lot of time to initially load the app because we need to download the script and executes it inside the users browser. In server-side rendering, the client gets the fully build HTML file, so that client no need to wait until the script downloads and creates the markup.
Uses of Server-Side Rendering
- Seo
- Improve the web Performance.
- Fast Interaction.
Normal React App markup
<!DOCTYPE html>
<html lang="en">
  <head>
    <meta charset="utf-8">
    <meta name="viewport" content="width=device-width, initial-scale=1, shrink-to-fit=no">
    <title>React App</title>
  </head>
  <body>
    <noscript>
      You need to enable JavaScript to run this app.
    </noscript>
    <div id="root"></div>
  </body>
</html>
How to Implement Server-Side Rendering Using Serverless Aws Lambda
Requirements
- Aws Account
- Nodejs
- Serverless framework cli.
Step 1
First we need to install the Serverless Framework cli.
Open your terminal and run below command.
npm install -g serverless

sls login // SLS is a shortcut of serverless
Step 2
After sls login, you need to configure your Aws Credentials with a serverless framework.
Step 3
Create a New Directory in your Pc.
mkdir ssr
cd ssr
Step 4
Serverless Offers us a different type of templates but we are using Node.js as our Backend so that we are creating a node.js template.
serverless create --template aws-nodejsThe above command generates the boilerplate.
Open the Project Directory in your Favorite code editor
For Bundling modules, I’m using Parceljs which is super fast.
parcel.js config
const Bundler = require("parcel-bundler");
const Path = require("path");

// Entrypoint file location
const server = Path.join(__dirname, "app.js");

// Bundler options
const serverOpt = {
  outDir: "./", // The out directory to put the build files in, defaults to dist
  outFile: "handler.js", // The name of the outputFile
  publicUrl: "./", // The url to server on, defaults to dist
  watch: true,
  cacheDir: ".cache", // The directory cache gets put in, defaults to .cache
  minify: true, // Minify files, enabled if process.env.NODE_ENV === 'production'
  target: "node", // browser/node/electron, defaults to browser
  logLevel: 3, // 3 = log everything, 2 = log warnings & errors, 1 = log errors
  sourceMaps: true, // Enable or disable sourcemaps, defaults to enabled (not supported in minified builds yet)
  detailedReport: true // Prints a detailed report of the bundles, assets, filesizes and times, defaults to false, reports are only printed if watch is disabled
};

// Entrypoint file location
const browser = Path.join(__dirname, "./src/index.js");

// Bundler options
const browserOpt = {
  outDir: "./Browser",
  outFile: "bundle.js",
  publicUrl: "./",
  watch: true,
  cacheDir: ".cache",
  minify: true,
  target: "browser",
  https: false,
  logLevel: 3,
  hmrPort: 0,
  sourceMaps: true,
  hmrHostname: "",
  detailedReport: false
};

const serverbundler = new Bundler(server, serverOpt);
const bundle = serverbundler.bundle();

// Initialises a bundler using the entrypoint location and options provided
const browserbundler = new Bundler(browser, browserOpt);
const bundle1 =browserbundler.bundle();
Now initialize the Package.json file
{
"name": "ssr-react",
"version": "1.0.0",
"description": "ssr rendering react using serverless",
"main": "index.js",
"scripts": {
"bundle": "rimraf Browser && node parcel.js",
"start": "sls offline start",
"deploy":"sls deploy"
},
"author": "",
"license": "ISC",
"babel": {
"presets": [
[
"env",
{
"targets": {
"browsers": [
">1%",
"last 3 versions"
]
}
}
],
"stage-2",
"latest",
"react"
],
"plugins": [
"syntax-dynamic-import",
"transform-class-properties"
]
},
"devDependencies": {
"babel": "^6.23.0",
"babel-cli": "^6.26.0",
"babel-core": "^6.26.3",
"babel-loader": "^7.1.4",
"babel-plugin-syntax-dynamic-import": "^6.18.0",
"babel-plugin-transform-class-properties": "^6.24.1",
"babel-preset-env": "^1.7.0",
"babel-preset-latest": "^6.24.1",
"babel-preset-react": "^6.24.1",
"babel-preset-stage-2": "^6.24.1",
"parcel-bundler": "^1.8.1",
"rimraf": "^2.6.2",
"serverless-offline": "^3.25.4"
},
"dependencies": {
"body-parser": "^1.18.3",
"cors": "^2.8.4",
"express": "^4.16.3",
"isomorphic-fetch": "^2.2.1",
"react": "^16.4.0",
"react-dom": "^16.4.0",
"react-router-dom": "^4.2.2",
"serverless-http": "^1.5.5"
}
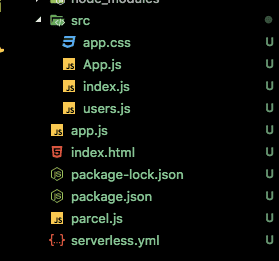
}Folder structure
import React,{Fragment} from "react";

const App = (props) => {
  return (
    <Fragment>
    <h1>Users</h1>
    <ul>
      {props.data.map((user, i) => {
        return <li key={i}>{user.name}</li>
      })}
    </ul>
 </Fragment>
  )
}

export default App;import fetch from 'isomorphic-fetch';
function Data() {
return fetch('https://jsonplaceholder.typicode.com/users')
.then(data => data.json())
}
export default Data;Isomorphic fetch helps us to fetch the data from both server and client side.
import React from "react";
import "./app.css";
import { hydrate } from "react-dom";

import App from "./Myfirst";
import Data from "./users";

Data().then(users => {
  hydrate(<App data={users} />, document.getElementById("root"));
});
Hydrate: if a markup is already generated by the server it doesn’t regenerate it again in the browser and attach the required event handlers.
index.html
<!DOCTYPE html>
<html lang="en">
<head>
    <meta charset="UTF-8">
    <meta name="viewport" content="width=device-width, initial-scale=1.0">
    <meta http-equiv="X-UA-Compatible" content="ie=edge">
    <title>SSR- React</title>
<link rel="stylesheet" href="/bundle.css">
</head>
<body>
<div id="root"><!--App--></div>

<script src="/bundle.js"></script>
</body>
</html>
Now here comes the main part so far we created a simple react app and HTML template.
Server Side Setup
create a new file called app.js in your directory
first, we need to import the required packages
import serverless from "serverless-http";
import express from "express";
import cors from "cors";
import bodyParser from "body-parser";
import React from "react";
import { renderToString } from "react-dom/server";
import App from "./src/App";
import Data from "./src/users";
import fs from "fs";
import path from "path";
Now we need to add some middlewares
const app = express();

app.use(cors());
app.use(bodyParser.json());
app.use(bodyParser.urlencoded({ extended: false }));
app.use(express.static(path.resolve(__dirname, "./Browser")));
const markup = fs.readFileSync(__dirname + "/index.html",
  "utf8"
);

app.get("**", (req, res) => {
  Data().then(users => {
    const html = renderToString(<App data={users} />);
    res.send(markup.replace("<!--App-->", html));
  });
});

module.exports.ssr = serverless(app);
In the above code first, we stored the HTML file in the markup variable
renderToString: Helps to Take the Jsx and gives us back an HTML string.
Now we need to Bundle our code and Transform the syntax for these open your terminal and run below command.
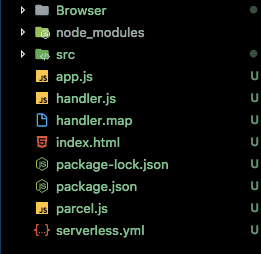
npm run bundleit creates the bundled code with Browser folder and handler.js file
client-side code goes inside the Browser folder app.js code is transformed to the es5 code and stored inside the handler.js file
Final step Serverless.yml setup
service: ssr

provider:
  name: aws
  runtime: nodejs8.10

functions:
  app:
    handler: handler.ssr
    events:
        - http: ANY /
        - http: 'ANY {proxy+}'

plugins:
  - serverless-offline
Serverless-offline plugin helps us to run the code in local environment.
handler: it means we need to tell on which file it needs to look.
Now open your Terminal and Run
npm startit will create a local server
How to Deploy the code?
sls deployOnce you run the command after some time your endpoints are visible in your terminal.
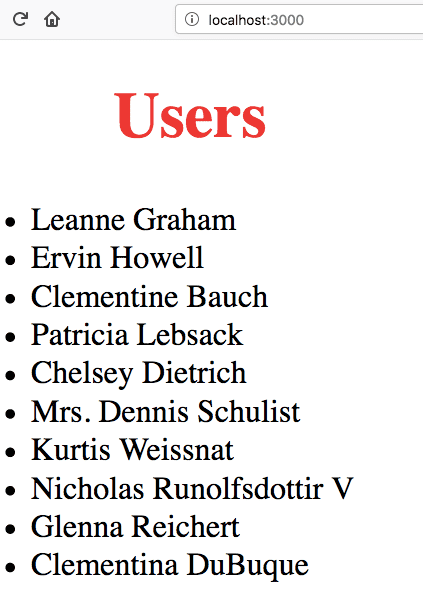
Server-side rendered React app.

- Share:


