Vue.js Directives List Tutorial with examples
In this tutorial, we are going to learn about different types of VueJS directives with the help of examples.
Contents
What is a Directive ?
A Directive is a special HTML attribute which starts with v-, where it helps to bind javascript expressions.
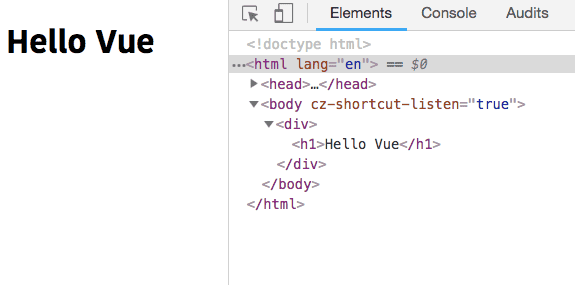
v-html
The v-html attribute helps us to interpolate the real html instead of plain text.
example:
<template>
  <div v-html="myHTML"></div></template>

<script>
export default{
    data:function(){
      return{
        myHTML: "<h1>Hello Vue</h1>"    }
  }
}
</script>
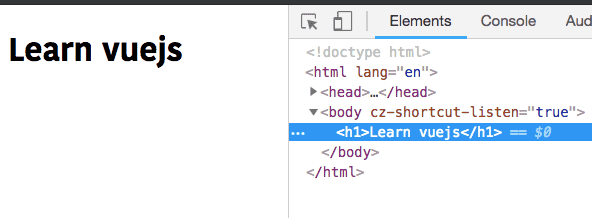
v-text
The v-text attribute is used to add the text to an html element.
example:
<template>
  <h1 v-text="title"></h1></template>

<script>
export default {
  data: function() {
    return {
      title:"Learn vuejs"    };
  }
};
</script>
v-bind
The v-bind directive dynamically binds attribute to a javascript expression.
Binding means substitution of a real value after it has been compiled.
example:
<template>
  <div>
    <!-- binds src attribute to an expression -->
    <img v-bind:src="dogImage" />
    <!-- v-bind shorthand syntax -->
    <img :src="dogImage" />
  </div>
</template>

<script>
export default {
  data: function() {
    return {
      dogImage: "https://i.imgur.com/A8eQsll.jpg"    };
  }
};
</script>
You can also bind other html attributes using v-bind directive.
<a :href="homeUrl">Home</a>

<button :disabled="isActive">Click</button>

<!-- class Binding -->
<div :class="{ red: isRed }"></div>
v-on
The v-on directive is used to attach an event listener to an html element.
example:
<template>
  <div>
    <h1>{{ title }}</h1>
  <!-- <button v-on:eventname="eventhandlerName">title</button> -->
    <button v-on:click="handleClick">Change title</button>  </div>
</template>

<script>
export default {
  data: function() {
    return {
      title: "Hello"
    };
  },
  methods: {
    handleClick: function() {
      this.title = "Hello Vue";
    }
  }
};
</script>
We can also pass inline expressions to v-on directive instead of a method.
 <template>
  <div>
    <h1>{{ title }}</h1>
     <button v-on:click="title='Hello vue'">Change title</button>  </div>
</template>

<script>
export default {
  data: function() {
    return {
      title: "Hello"
    };
  }
};
</script>
v-model
The v-model directive creates two data binding on a form elements.
example:
<template>
  <div>
    <input v-model="name" placeholder="Name" />    <p>{{ name }}</p>
  </div>
</template>

<script>
export default {
  data: function() {
    return {
      name: "King"
    };
  }
};
</script>
select element
<template>
  <form>
    <select v-model="rating">     <option disabled value="">Choose your Rating</option>
      <option>1</option>
      <option>2</option>
      <option>3</option>
      <option>4</option>
      <option>5</option>
    </select>
    <p>You've rated: {{ rating }}</p>
  </form>
</template>

<script>
export default {
  data: function() {
    return {
      rating: ""
    };
  }
};
</script>
v-if
The v-if directive allows us to render html elements conditionally based on the truthiness of the expression value.
example:
<template>
  <div>
    <h1 v-if="isActive">Conditional rendering</h1>    <button v-on:click="isActive = !isActive;">Show</button>
  </div>
</template>

<script>
export default {
  data: function() {
    return {
      isActive: false    };
  }
};
</script>
In the above code, we have added v-if="isActive" to h1 element so that h1 element only render into the dom when isActive is true.
v-for
v-for directive is used to loop over the array of elements and render it into the dom.
example:
<template>
 <ul>
   <!-- list rendering starts -->
  <li v-for="user in users">{{user.name}}</li> </ul>
</template>

<script>
 export default{
     data:function(){
         return{
             users:[
                 {id:1,name:"king"},
                 {id:2,name:"gowtham"},
                 {id:3,name:"ooops"},
             ]
         }
     }
 }
</script>
In the above code, we are looping through the users array by using v-fordirective, so that on each iteration user variable is pointing to the different object present inside the array.


