Form Validation in Vue.js using VeeValidate
In this tutorial, we are going to learn about how to validate the forms in vue by using the veevalidate library.
Creating Vue App
Let’s create the new Vue app by running the following command in your terminal.
vue create vue-form-validation && cd $_This above command will download the Vue app related files in the vue-form-validation folder and change your working current directory to vue-form-validation.
Installing VeeValidate
Let’s install the VeeValidate library by running the below command in your terminal.
npm i vee-validateOnce you successfully installed vee-validate library now open your vue-form-validation folder in your favorite code editor and we need to tell vuejs to use this vee-validate library.
import Vue from 'vue';
import VeeValidate from 'vee-validate';
import App from './App.vue'

Vue.use(VeeValidate);
Vue.config.productionTip = false

new Vue({
  render: h => h(App),
}).$mount('#app')
Now we can use vee-validate library anywhere form our vue app.
Validating input field
For validating input field we need to add v-validate attribute with value required
 <template>
   <form>
   <input
        type="text"
        name="name"
        v-validate="'required'"        placeholder="Name"
        v-model="name"
      >
    </form>
 </template>

<script>
export default {
  data: function() {
    return {
      name: ""
    };
  },
};
</script>
Displaying errors
To display the errors we need to use a errors.has() method provided by the vee-validate library.
 <template>
   <form>
   <input
        type="text"
        name="name"
        v-validate="'required'"
        placeholder="Name"
        v-model="name"
      >
      <p v-if="errors.has('name')">{{errors.first('name')}}</p>   </form>
 </template>

<script>
export default {
  data: function() {
    return {
      name: ""
    };
  },
};
</script>
In the above code, we have used errors.has('name') to check is there any errors in input name field
if any error is found, we are displaying the error message with the help of errors.first method.
Let’s test it now
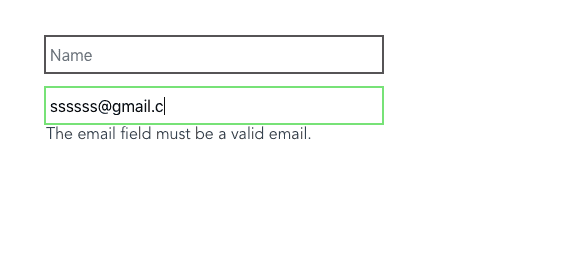
Validating Email
To validate the email field we need to add an email value to v-validate attribute.
 <template>
   <form>
   <input
        type="text"
        name="name"
        v-validate="'required'"
        placeholder="Name"
        v-model="name"
      >
      <p v-if="errors.has('name')">{{errors.first('name')}}</p>

      <input
        type="text"
        name="email"
        v-validate="'required|email'"        placeholder="Email"
        v-model="email"
      >
      <p v-if="errors.has('email')">{{errors.first('email')}}</p>
   </form>
 </template>

<script>
export default {
  data: function() {
    return {
      name: "",
      email:""
    };
  },
};
</script>
Displaying errors based on events
We can also display the error messages based on the events like change or blur event.
 <template>
   <form>
   <input
        type="text"
        name="name"
        v-validate="'required'"
        placeholder="Name"
        v-model="name"
      >
      <p v-if="errors.has('name')">{{errors.first('name')}}</p>

      <input
        type="text"
        name="email"
        v-validate="'required|email'"
        data-vv-validate-on="blur|change"        placeholder="Email"
        v-model="email"
      >
      <p v-if="errors.has('email')">{{errors.first('email')}}</p>
   </form>
 </template>

<script>
export default {
  data: function() {
    return {
      name: "",
      email:""
    };
  },
};
</script>
Now we can only see an error message when a user stops typing and move to another field.
Submitting Form
The VeeValidate library provides us a validateAll method by using this we can check if every field is valid or not at the time of form submission.
 <template>
  <form>
    <input type="text" name="name"
    v-validate="'required'"
    placeholder="Name"
    v-model="name"
    >
    <p v-if="errors.has('name')">{{errors.first('name')}}</p>

    <input
      type="text"
      name="email"
      v-validate="'required|email'"
      data-vv-validate-on="blur|change"
      placeholder="Email"
      v-model="email"
    >
    <p v-if="errors.has('email')">{{errors.first('email')}}</p>
    <button class="signup-btn" :disabled="errors.items.length>0"    @click.prevent="validateAll">Submit</button>  </form>
</template>

<script>
export default {
  data: function() {
    return {
      name: "",
      email: ""
    };
  },
  methods: {
    validateAll() {
      this.$validator.validateAll().then(result => {
        if (result) {
          alert("Form Submitted!");
          return;
        }
      });
    }
  }
};
</script>- Share:


