How to use Radio Buttons in React
In this tutorial, we are going to learn about how to use radio buttons in react with class-based components and hooks.
Radio buttons
Radio buttons are used to select exactly one option from the available list, for example, choose the correct answers.
Using Radio buttons in React
To use the radio buttons in react we need to group the radio buttons with a name attribute and onChange event handler method is added to each radio button to access the data.
Here is an example:
import React,{Component} from 'react';

class App extends Component {
    state = {
      gender:""    };

    handleChange=(e)=>{
        this.setState({
          gender: e.target.value        })
    }

  render() {
    return (
      <div>
         <form>
            <input type="radio" value="male" id="male"
              onChange={this.handleChange} name="gender" />            <label for="male">Male</label>

            <input type="radio" value="female" id="female"
              onChange={this.handleChange} name="gender"/>            <label for="female">Female</label>
         </form>

         <p>You gender is --> {this.state.gender}</p>      </div>
    );
  }
}
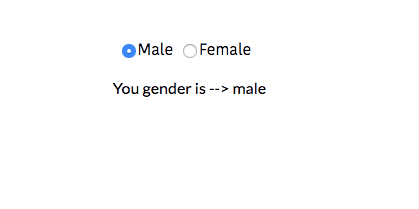
In the above code, we have grouped two radio buttons with a name attribute value to gender.
When a user selects the radio button handleChange() method is invoked and access the radio button value to update the state.
Output:
Using Radio buttons in React Hooks
Let’s see how to use the radio button in hooks.
import React, { useState } from 'react';
function App() {
   const [gender,setGender]=useState('');
   const handleChange=(e)=>{
       setGender( e.target.value);    }

    return (
      <div>
         <form>
             <input type="radio" value="male" id="male"
               onChange={handleChange} name="gender" />
             <label for="male">Male</label>

            <input type="radio" value="female" id="female"
              onChange={handleChange} name="gender"/>
            <label for="female">Female</label>
         </form>

         <p>You gender is --> {gender}</p>
      </div>
    );
}


