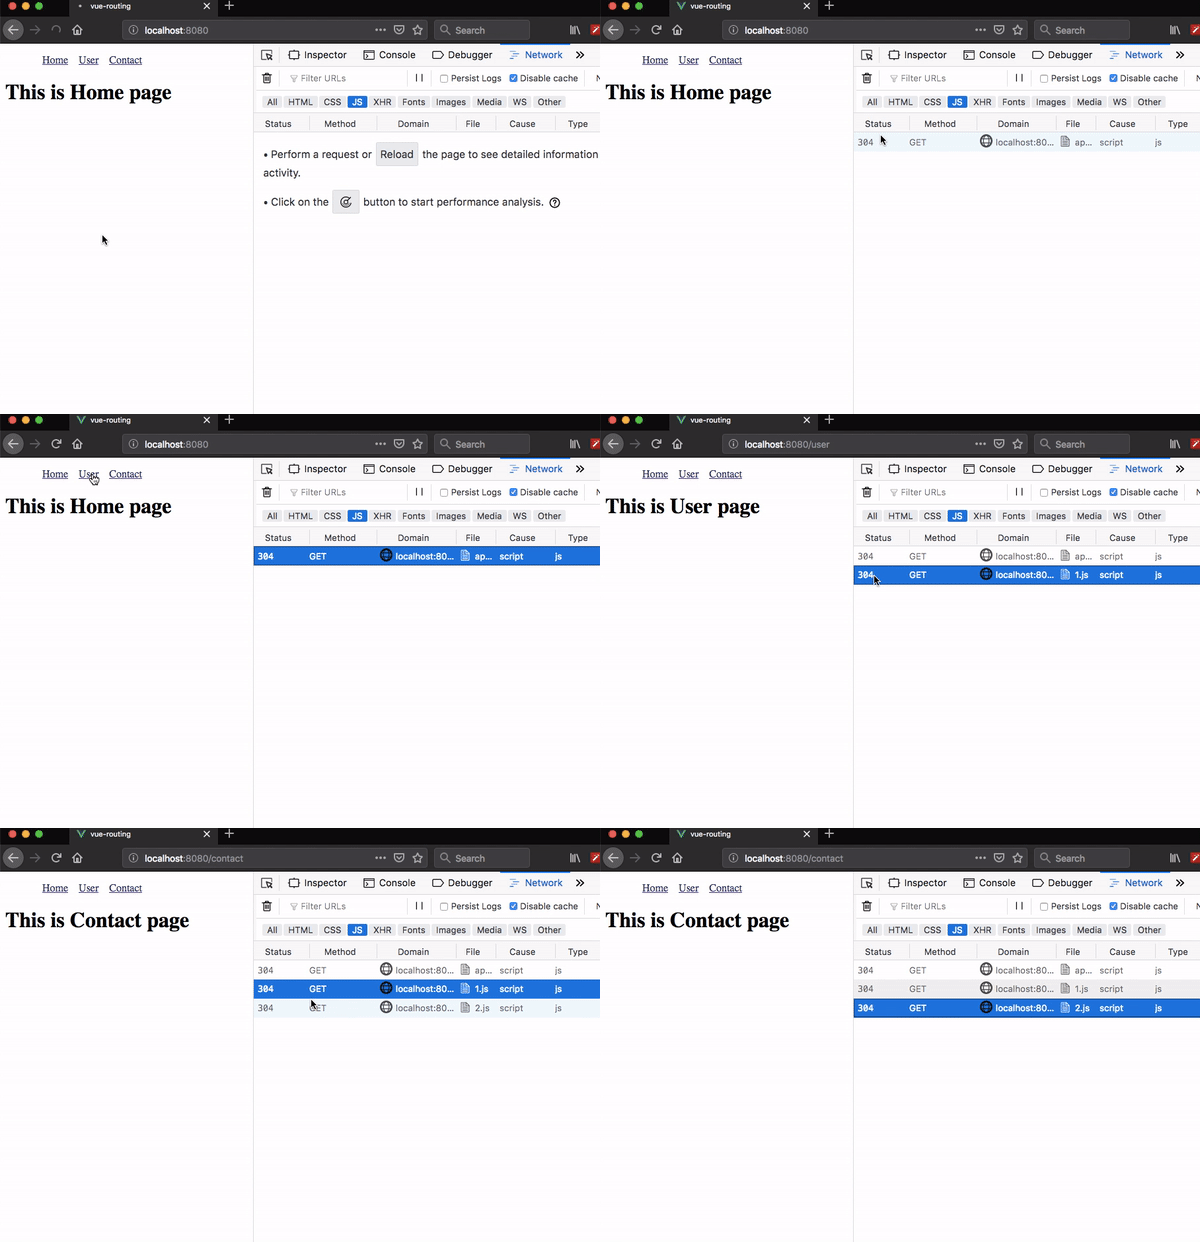
How to implement Lazy loading in Vue router
Lazy loading helps us to split our code into chunks and load that chunk when a route is activated.
Getting started
First, we are creating a new vue project by using vue-cli.
vue create vue-lazyThis above command will download vue-related files into vue-lazy folder.
Change your working directory by running the following command.
cd vue-lazyNow, open vue-lazy folder in your favorite code editor.
Creating components
Let’s create three new components inside our components folder so that we can create routing.
<template>
  <div>
    <h1>This is Home page</h1>
  </div>
</template><template>
<div>
<h1>This is User page</h1>
</div>
</template><template>
<div>
<h1>This is Contact page</h1>
</div>
</template>Installing vue router
Let’s install the vue router package from the npm.
npm i vue-routerCreating Lazy routes
For lazy loading, we need to use the dynamic import syntax instead of normal imports.
Open your main.js replace it with below code.
import Vue from 'vue'
import App from './App.vue';
import VueRouter from "vue-router";
import Home from './components/Home.vue';

 // dynamic imports
const User = () => import('./components/User.vue');const Contact = () => import('./components/Contact.vue');
Vue.use(VueRouter);

const router = new VueRouter({
  mode: "history",
  routes: [
    { path: '/', component: Home },
    {path: '/user', component: User},
    {path: '/contact', component: Contact}
  ]
})

Vue.config.productionTip = false

new Vue({
  router,
  render: h => h(App),
}).$mount('#app')
Adding Navigation
<template>
  <div id="app">
    <ul class="nav">
      <router-link to="/">Home</router-link>
      <router-link to="/user">User</router-link>
      <router-link to="/contact">Contact</router-link>
    </ul>
    <router-view></router-view>
  </div>
</template>

<script></script>

<style>
a {
  margin-left: 1rem;
}
</style>
Let’s test our vue app in the browser by opening network panel.


