Vue CLI 3 tutorial-How to create Vue project
In this tutorial, we are going to learn about how to create a Vue project by using Vue CLI(command line interface) and Vue UI.
Vuejs offers us Command line interface for quickly generating the vue projects.
Installing Vue Cli
Let’s install the Vue cli by running the following command in your terminal.
npm install -g @vue/cliIf you’re using a mac then you need to add
sudobeforenpm.
Creating Our Vue project
Once you successfully installed vue-cli you will have access to the vue binary in your command line.
Let’s create our vue project by running below command.
vue create my-vueapp #vue create folder-nameThis command will download our project-related files in my-vueapp folder.
Once you run this command you will prompt with different questions.
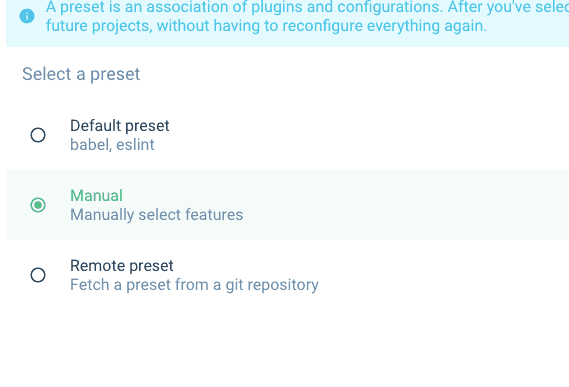
Select the manually select features option by using your down arrow keys and hit enter.
Vue CLI v3.0.0
? Please pick a preset:
  default (babel, eslint)
❯ Manually select features
Now it will prompt with various add-ons to add in our project Use spacebar to select CSS Pre-processors then hit enter.
? Please pick a preset: Manually select features
? Check the features needed for your project:
◉ Babel
◯ TypeScript
◯ Progressive Web App (PWA) Support
◯ Router
◯ Vuex
❯◉ CSS Pre-processors
◉ Linter / Formatter
◯ Unit Testing
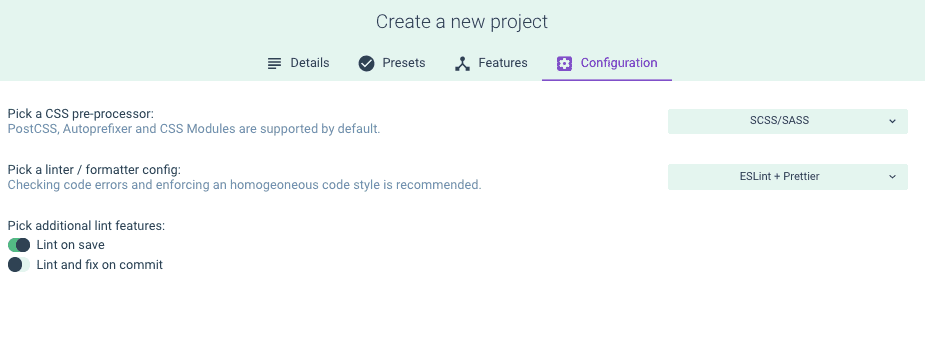
◯ E2E TestingNow it will ask for choose your CSS pre-processor by using arrow keys to select your favorite preprocessor.
We will go with SCSS/SASS.
? Pick a CSS pre-processor (PostCSS, Autoprefixer
 and CSS Modules are supported by default): (Use arrow keys)
❯ SCSS/SASS
  LESS
  Stylus
We will then choose ESLint+Prettier option for our project.
? Pick a linter / formatter config:
  ESLint with error prevention only
  ESLint + Airbnb config
  ESLint + Standard config
❯ ESLint + Prettier
Now It will prompt with additional lint features option choose Lint on save option and hit enter.
? Pick additional lint features
> to invert selection)
❯◉ Lint on save
 ◯ Lint and fix on commit
Now choose dedicated config files option.
? Where do you prefer placing config for Babel,
PostCSS, ESLint, etc.?
❯ In dedicated config files
  In package.json
We will ask for Save this as a preset for future projects enter N for this project.
Save this as a preset for future projects? (y/N): NNote: if you like to save this options as your preset then type:
Yso that next time if you’re creating a vue project you can choose this preset to generate your vue project fastly.
Once successfully downloaded our project-related files in my-vueapp
folder now we need to change our current working directory by using below command.
cd my-vueappRunning our Development server
Let’s serve our vue project by running our development server.
In your terminal run the following command to start development server.
npm run serve
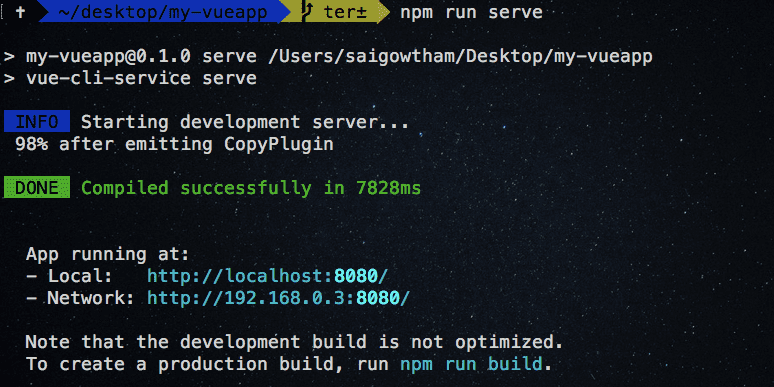
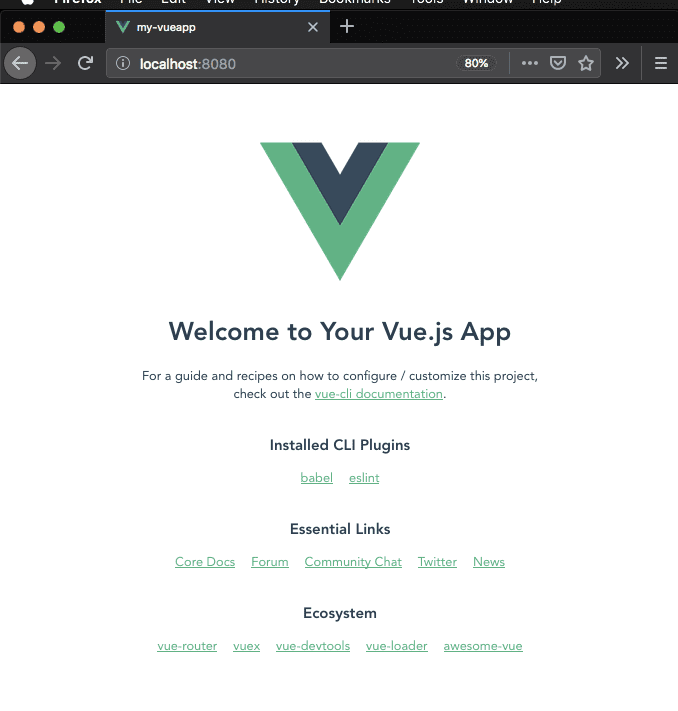
Now open your browser and enter localhost:8080 to see our vue app.
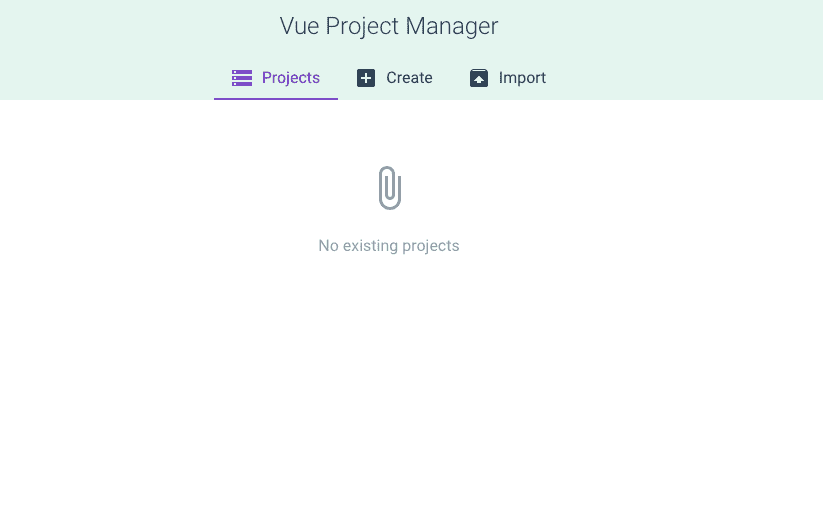
Vue UI
So far we have learned how to create Vue app by using command line interface
now let’s create the same vue project by Vue graphical user interface.
Open your terminal and run following command to start Vue GUI in your browser.
vue ui
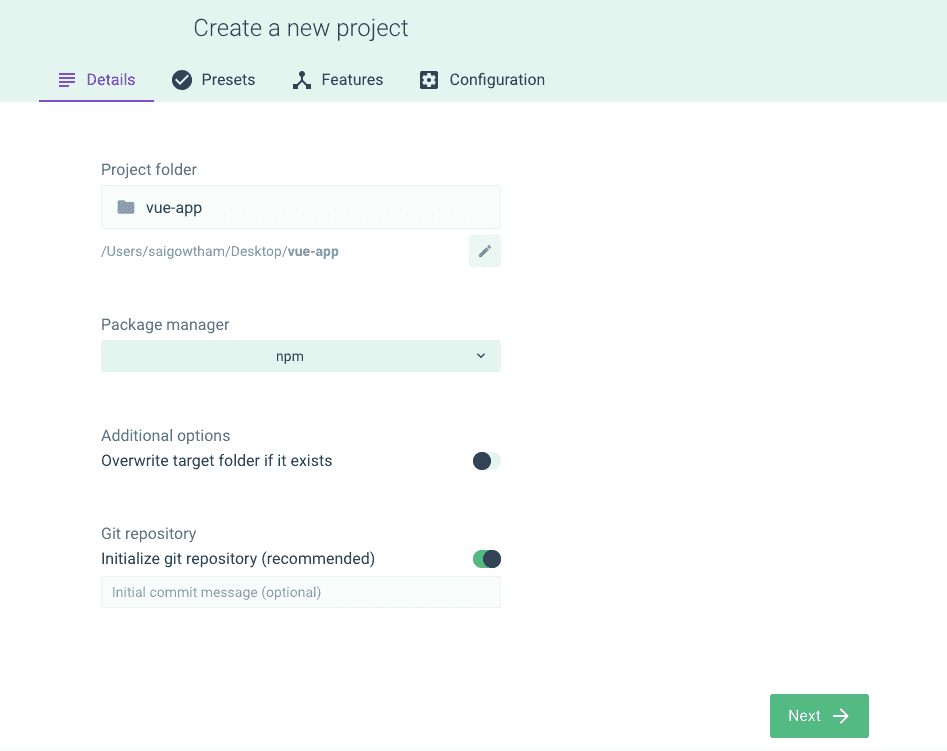
Now click on a create tab and select location to save your app then click on Create a new project here button.
Enter your project name and choose your package manager then click on Next button.
We will then choose manually select features option.
Next, we will select the preprocessors option on the features tab.

On configurations tab, we select scss/sass option by using dropdown and
select ESlint+prettier option then click on Create project button it will prompt with enter your preset name select continue without saving option.
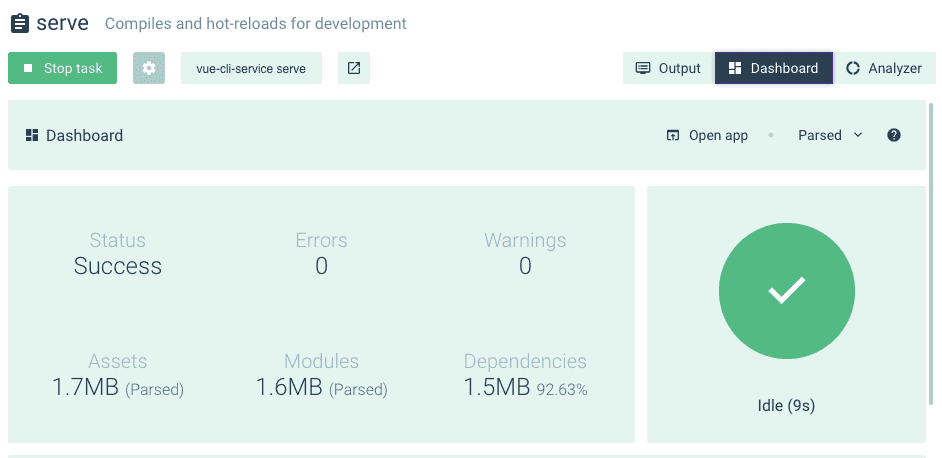
Now click on Tasks in your left side navigation and select serve option.
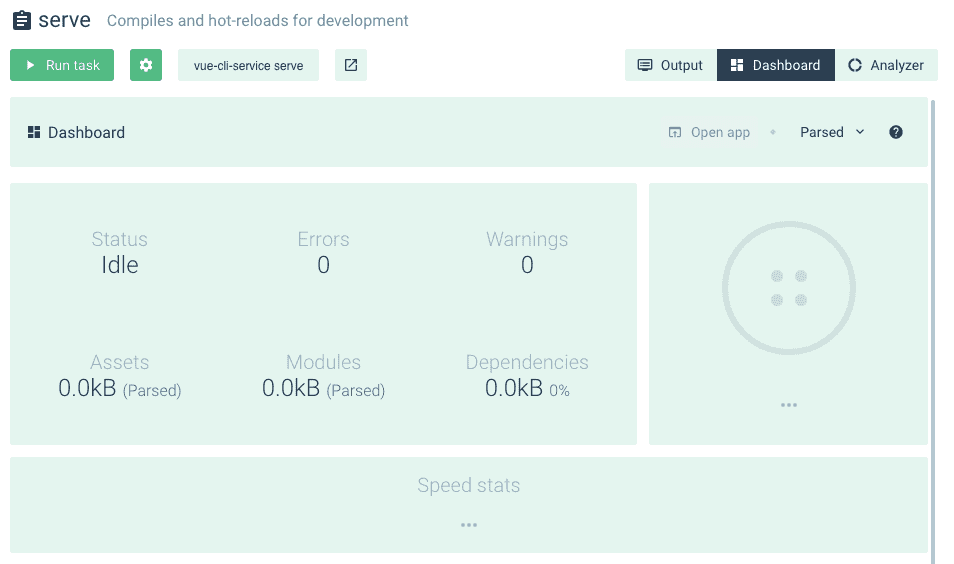
Let’s click on Run task button to start the development server then click on open app to open the vue app in your browser.
Exploring our project
Let’s explore our vue project we just created by using cli or Vue ui.
vue-folder-structure
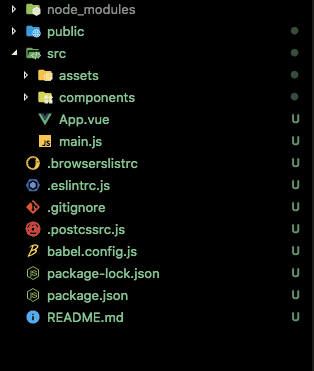
node_modules: In this folder, we have all required packages to run the vue app.
src: In the src folder, our Vue app is stored.
public: In this folder, we have an index.html file and favicon.
main.js: This is the main file where our vue app mounts to the dom.
import Vue from "vue";
import App from "./App.vue";
Vue.config.productionTip = false;
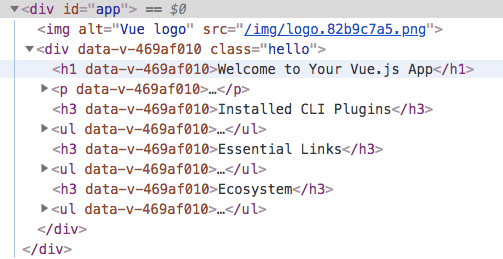
new Vue({ render: h => h(App)}).$mount("#app");It means we rendering our Vue app inside our div tag with id app.
components: In this folder, we store reusable pieces of Vue components
For example: Button component.
App.vue: This App.vue file drives our vue app by importing required components.
<template>
  <div id="app">
    <img alt="Vue logo" src="./assets/logo.png" />
    <HelloWorld msg="Welcome to Your Vue.js App" />
  </div>
</template>

<script>
import HelloWorld from "./components/HelloWorld.vue";

export default {
  name: "app",
  components: {
    HelloWorld
  }
};
</script>

<style lang="scss">
#app {
  font-family: "Avenir", Helvetica, Arial, sans-serif;
  -webkit-font-smoothing: antialiased;
  -moz-osx-font-smoothing: grayscale;
  text-align: center;
  color: #2c3e50;
  margin-top: 60px;
}
</style>
Each .vue file we have template tag ,script tag and style tag.
template tag : In this tag, we are writing our HTML markup required for our app.
script tag: In this tag, we write JavaScript related code.
style tag: In this tag, we write CSS code to style our app.
- Share:


