State management in React using Redux and React-redux
In this tutorial, we are going to learn about how to manage the state in react by using redux and react-redux libraries.
If you want to learn basics about redux then check out previous tutorial React Redux beginners tutorial.
Getting started
First, we need to install the new react app by using a create-react-app command line tool.
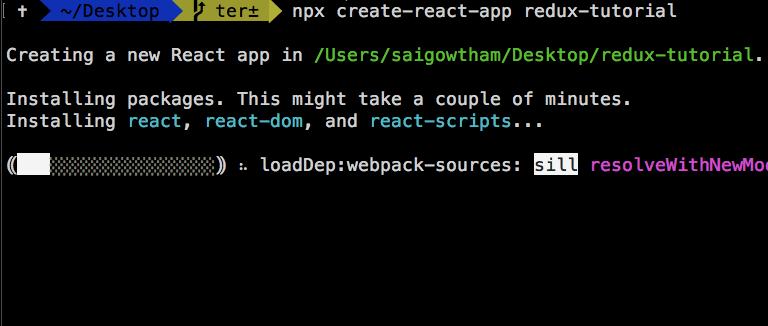
Run the below command to install the react app.
npx create-react-app redux-tutorialThis above command will download the react related files in the “redux-tutorial” folder.
Once you successfully installed now change your working directory to app directory by using below commands.
cd redux-tutorial
npm start
npm start command is used turn on the local development server on localhost:3000.
Note: If you stuck anywhere in this tutorial then please checkout code repository on [GitHub](
https://github.com/saigowthamr/redux-tutorial)
Installing Redux Library
Let’s install the redux and react-redux library by using following commands.
npm i redux react-reduxredux : Redux is used to manage the state
react-redux : It is used to make the bindings between the redux library and react.
Now open your “redux-tutorial” folder by using your favorite code editor.
Reducer function
Reducer function is a pure function which takes the previous app state, type of action and
returns the next state without mutating the previous state.
Redux follows the immutability it means we are not mutating the app state instead of we are returning the new app state.
Redux manages the whole app state in the single JavaScript object.
create a new folder called reducers in your src directory.
Inside the reducers, folder create a new file called reducer.js.
const intialState = { name: "reactgo", allNames: []}

const reducer = (state = intialState, action) => {

    if (action.type === "ADDNAME") {
        return {
            allNames: state.allNames.concat(state.name),
            name: ""
        }
    }

    if (action.type === "CHANGE_NAME") {
        return {
            ...state,
            name: action.name
        }
    }

    return state
}

export default reducer;
In the above code, we have defined a reducer function with two parameters state and action.
Inside the reducer function, we have added two conditional statements.
Our initial state object is { name: "", allNames: []}.
Connecting React with Redux
Its time to connect our react app with the redux.
Open your index.js present inside your src folder.
import React from 'react';
import ReactDOM from 'react-dom';
import { createStore } from 'redux'import { Provider } from 'react-redux';import App from './App';
import reducer from './reducers/reducer'

const store = createStore(reducer);
ReactDOM.render(
    <Provider store={store}>        <App />    </Provider>    , document.getElementById('root'));
Inside the index.js file we imported createStore function from the ‘redux’ library and
Provider component from the react-redux library.
We invoke the createStore function by passing the reducer function as an argument and we wrap the
<Provider> component with the <App/> component by passing a store attribute.
<Provider> component uses the react context API to pass the state down through the component tree.
Accessing the redux state from the components
Now we can access our redux state straight from the React components.
Open your App.js file and add the below code.
mapStatetoProps example
import React, { Component } from 'react';
import { connect } from 'react-redux'
import './App.css'

class App extends Component {

  render() {
    return (
      <div className="App">

        <div>
          <input type="text"
            placeholder="Name"
            value={this.props.name} />
      </div>
    );
  }
}


const mapStatetoProps = (state) => {
  return {
    name: state.name,
  }
}

export default connect(mapStatetoProps)(App);
Here we first imported the Higher-order component called connect from the react-redux library
then we defined a mapStatetoProps function with the state parameter.
By using state parameter we can access the redux state which we defined inside the reducer function.
Any property we defined inside the mapStatetoProps function can available as a props inside the App component for example ,In the above component we returned an object with {name:state.name} so that we can access that name property inside the App component as a this.props.name.
At last, we need to invoke the connect function by passing the mapStatetoProps as an argument.
If you open your browser now you can see “reactgo” is displayed inside the input field.

Mutating the Redux state
The redux state tree is read-only, we can’t mutate the state directly.
In redux, we can only mutate the state by invoking a dispatch method with the type of action.
If you open reducer.js file you can see they are two types of actions available which are ADDNAME and CHANGE_NAME.
const intialState = { name: "reactgo", allNames: []}

const reducer = (state = intialState, action) => {
    if (action.type === "ADDNAME") {
        return {
            allNames: state.allNames.concat(state.name),
            name: ""
        }
    }
    if (action.type === "CHANGE_NAME") {
        return {
            ...state,
            name: action.name
        }
    }

    return state
}

export default reducer;
If we invoke the dispatch method with the type ADDNAME then we are returning the new state with the
name property values are added to the allNames array and resetting the name property.
Let’s see in action.
Open your App.js file add the below code.
mapDispatchtoProps example
import React, { Component } from 'react';
import { connect } from 'react-redux'
import './App.css'

class App extends Component {


  handleNameChange = (e) => {
    this.props.onChangeName(e.target.value)
  }


  render() {
    return (
      <div className="App">

        <div>
          <input type="text"
            placeholder="Name"
            value={this.props.name} onChange={this.handleNameChange} />

          <button onClick={this.props.onAddName}>Add name</button>

          <ul>
            {this.props.allNames && this.props.allNames.map(name => (
              <li key={name}> {name}</li>
            ))}
          </ul></div>

      </div>
    );
  }
}


const mapStatetoProps = (state) => {
  return {
    name: state.name,
    allNames: state.allNames
  }
}


const mapDispatchtoProps = (dispatch) => {
  return {
    onChangeName: (name) => dispatch({ type: "CHANGE_NAME", name: name }),
    onAddName: () => dispatch({ type: "ADDNAME" }),
  }
}

export default connect(mapStatetoProps, mapDispatchtoProps)(App);
In the above, we defined a mapDispatchtoProps function where we get the dispatch method as a function parameter.
Inside the mapDispatchtoProps function we returned a object with two properties onChangeName and
onAddName
onChangeName : it helps us to dispatch the action type CHANGE_NAME and payload name property which is added by the user.
onAddName: it helps us to dispatch the action type ADDNAME.
We can access these two properties inside the App component as a props.
Let’s test it now in the browser.
Handling the Errors
We can also handle the errors by creating an ERROR type inside the reducer function.
Update your reducer.js file with below code
const intialState = { name: "reactgo", allNames: [], error: "" }

const reducer = (state = intialState, action) => {
    if (action.type === "ADDNAME") {
        return {
            allNames: state.allNames.concat(state.name),
            name: ""
        }
    }
    if (action.type === "CHANGE_NAME") {
        return {
            ...state,            name: action.name
        }
    }
    if (action.type === "ERROR") {
        return {
            ...state,
            error: action.error
        }
    }

    return state
}
export default reducer;
In the above code, we updated our reducer function by adding a
a third conditional statement with type ERROR and error property is added to our
initialState object.
Let’s dispatch the action type ERROR in our App component.
import React, { Component } from 'react';
import { connect } from 'react-redux'
import './App.css'

class App extends Component {


  handleNameChange = (e) => {
    this.props.onChangeName(e.target.value)
  }

  handleClick = () => {

    if (this.props.name) {
      this.props.onAddName()
    } else {
      this.props.onError("Name field cannot be empty")    }

  }

  render() {
    return (
      <div className="App">

        <div>
          <input type="text"
            placeholder="Name"
            value={this.props.name} onChange={this.handleNameChange} />
          <button onClick={this.handleClick}>Add name</button>

          <p className={this.props.error ? "error active" : "error"}>
          {this.props.error}</p>
          <ul>
            {this.props.allNames && this.props.allNames.map(name => (
              <li key={name}> {name}</li>
            ))}
          </ul></div>

      </div>
    );
  }
}


const mapStatetoProps = (state) => {
  return {
    name: state.name,
    error: state.error,    allNames: state.allNames
  }
}


const mapDispatchtoProps = (dispatch) => {
  return {
    onChangeName: (name) => dispatch({ type: "CHANGE_NAME", name: name }),
    onAddName: () => dispatch({ type: "ADDNAME" }),
    onError: (err) => dispatch({ type: "ERROR", error: err })  }
}

export default connect(mapStatetoProps, mapDispatchtoProps)(App);
In the above, we added a conditional check inside the handleClick method so that
whenever a user tries to click on a Add name button without typing the name, we are invoking the this.props.onError method by passing an error message.
output
Refactoring the code
It’s hard to type the action types in many places manually so that we are a
creating two new files which are actionCreators.js and actionTypes.js
In actionTypes.js file we are defining all our actions types.
Currently, we have three types of actions in our app CHANGE_NAME , ADDNAME and ERROR
Create a actions folder in your src directory.
Inside the actions folder create an actionTypes.js file and the below code.
export const ADDNAME = "ADDNAME";
export const CHANGE_NAME = "CHANGE_NAME";
export const ERROR = "ERROR";
create a new file called actionCreators.js inside your actions folder.
import { CHANGE_NAME, ADDNAME, ERROR } from './actionTypes'


export function changeName(name) {
    return {
        type: CHANGE_NAME,
        name: name
    }
}

export function addname() {
    return {
        type: ADDNAME
    }
}
export function error(msg) {
    return {
        type: ERROR,
        error: msg
    }
}
In the above, we have created three action creators which returning the three different type of actions.
Action creators are JavaScript functions which return the objects with a type of actions.
Update your reducer.js file with actionTypes
import { CHANGE_NAME, ADDNAME, ERROR } from '../actions/actionTypes'

const intialState = { name: "reactgo", allNames: [], error: "" }

const reducer = (state = intialState, action) => {

    if (action.type === ADDNAME) {
        return {
            allNames: state.allNames.concat(state.name),
            name: ""
        }
    }

    if (action.type === CHANGE_NAME) {
        return {
            ...state,
            name: action.name
        }
    }

    if (action.type === ERROR) {
        return {
            ...state,
            error: action.error
        }
    }

    return state


}
export default reducer;
Update the App.js file with the action creators.
import React, { Component } from 'react';
import { connect } from 'react-redux'
import { addname, error, changeName } from './actions/actionCreators'
import './App.css'

class App extends Component {


  handleNameChange = (e) => {
    this.props.onChangeName(e.target.value)
  }

  handleClick = () => {

    if (this.props.name) {
      this.props.onAddName()
    } else {
      this.props.onError("Name field cannot be empty")
    }

  }

  render() {
    return (
      <div className="App">

        <div>
          <input type="text"
            placeholder="Name"
            value={this.props.name} onChange={this.handleNameChange} />
          <button onClick={this.handleClick}>Add name</button>
          <p className={this.props.error ? "error active" : "error"}>
          {this.props.error}</p>
          <ul>
            {this.props.allNames && this.props.allNames.map(name => (
              <li key={name}> {name}</li>
            ))}
          </ul></div>

      </div>
    );
  }
}


const mapStatetoProps = (state) => {
  return {
    name: state.name,
    error: state.error,
    allNames: state.allNames
  }
}


const mapDispatchtoProps = (dispatch) => {
  return {
    onChangeName: (name) => dispatch(changeName(name)),
    onAddName: () => dispatch(addname()),
    onError: (err) => dispatch(error(err))
  }
}

export default connect(mapStatetoProps, mapDispatchtoProps)(App);
Have you seen now our code looks a bit organized?.
- Share:


