How to Make a Post request in React using Axios
In this tutorial, we are going to learn about how to make a http post request in react using the axios.
Installing Axios
First, we need to install the axios http client library from the npm.
Run the below command in your terminal to install the axios.
npm i axiosPost component
This is our Post component which contains input field and textarea field where two way data binding is used to access the input values.
import React,{Component} from 'react';

class Post extends Component {
  state = {
    title: "",    body: ""  };
  onTitleChange = e => {
    this.setState({
      title: e.target.value
    });
  };

  onBodyChange = e => {
    this.setState({
      body: e.target.value
    });
  };
  render() {
    return (
      <div className="post">
        <form className="post" >
          <input placeholder="Title" value={this.state.title}            onChange={this.onTitleChange} required          />
          <textarea            placeholder="Body" value={this.state.body}            onChange={this.onBodyChange} required          />
          <button type="submit">Create Post</button>
        </form>
      </div>
    );
  }
}
export default Post;
Making a post request using axios
import React, { Component } from "react";
import axios from "axios";
class Post extends Component {
  state = {
    title: "",
    body: ""
  };

  onTitleChange = e => {
    this.setState({
      title: e.target.value
    });
  };

  onBodyChange = e => {
    this.setState({
      body: e.target.value
    });
  };
  handleSubmit = e => {
    e.preventDefault();
    const data = {
      title: this.state.title,
      body: this.state.body
    };
    axios      .post("https://jsonplaceholder.typicode.com/posts", data)      .then(res => console.log(res))      .catch(err => console.log(err));  };

  render() {
    return (
      <div className="post">
        <form className="post" onSubmit={this.handleSubmit}>
          <input
            placeholder="Title" value={this.state.title}
            onChange={this.onTitleChange} required
          />
          <textarea
            placeholder="Body" value={this.state.body}
            onChange={this.onBodyChange} required
          />
          <button type="submit">Create Post</button>
        </form>
      </div>
    );
  }
}

export default Post;
In the above code, we first imported axios object from the axios library.
Where axios.post() method takes two arguments, the first argument is url and the second argument
is the data we need to post to our backend server.
At final, we chained with then() method and catch() method.
then method is invoked when a post request is successful.
catch method is invoked when a post request is failed and error has occurred.
Output
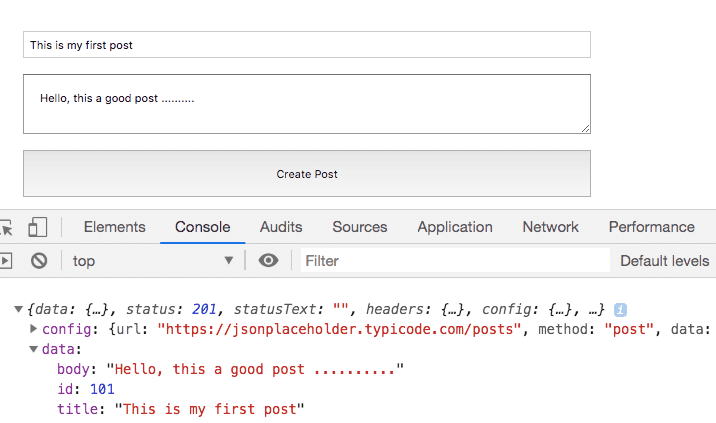
- Share:


