Getting started with GraphQL, Apollo and React hooks
In this tutorial, we are going to learn about how to fetch and mutate the data from the GraphQL API in react apps by using Apollo client, react hooks.
We are using the GitHub GraphQL API for learning purposes.
Note: if you stuck anywhere in this tutorial, then please refer to the final code repository on GitHub
Setup the react app
Let’s set up the react app by using the create-react-app.
npx create-react-app react-apolloThe above command will download the required files in the “react-apollo” folder to start the react app.
change your working directory to “react-apollo”.
cd react-apollo
npm start
npm start command is used to start the local development server.
Now we need to install the Apollo client packages.
Run the following command in your terminal.
npm install apollo-boost @apollo/react-hooks graphqlThis above command will download the three packages which are apollo-boost, @apollo/react-hooks and graphql.
Connecting with GitHub GraphQL API
Open your GitHub account and navigate to settings then click on developer settings and generate personal access token by selecting the fields.
Note: copy the personal access token and save it in your pc because the token is only visible once.
Now open your index.js file in your react app and add the below code with your personal access token.
import React from 'react';
import { render } from 'react-dom';
import './index.css';
import App from './App';
import ApolloClient from "apollo-boost";

const client = new ApolloClient({
    uri: "https://api.github.com/graphql",    request: operation => {
        operation.setContext({
            headers: {
                authorization: `Bearer your-personal-access-token`            },
        });
    }
});

render(<App />, document.getElementById('root'));
Here we import an ApolloClient constructor from the apollo-boost package and instantiate the client.
uri : The graphql endpoint we are using to fetch the data.
request : For every request, we are sending the authorization header to verify the current user.
Connecting client with React
Now we need to connect the client with react by using <ApolloProvider> component which is imported from the @apollo/react-hooks package. The ApolloProvider component helps us to access the client anywhere from our app component tree.
import React from 'react';
import { render } from 'react-dom';
import './index.css';
import App from './App';
import ApolloClient from "apollo-boost";
import { ApolloProvider } from "@apollo/react-hooks";
const client = new ApolloClient({
    uri: "https://api.github.com/graphql",
    request: operation => {
        operation.setContext({
            headers: {
                authorization: `Bearer your-personal-access-token`
            },
        });
    }
});

render(
    <ApolloProvider client={client}>        <App />
    </ApolloProvider>, document.getElementById('root'));
Fetching Data from components
Now we can fetch data directly from our react components using useQuery hook.
useQuery hook accepts the query as a first argument and returns an object with three properties
data, loading and error.
data : It contains the data which comes back from our graphql api.
loading : The loading property is true when the query is still in process.
error: The error property contains error-related data.
Open your App.js file and add the following code.
import React from 'react';
import './App.css';
import { gql } from 'apollo-boost'
import { useQuery } from '@apollo/react-hooks'
function App() {

  const { loading, error, data } = useQuery(gql` {
    viewer {
     name
     email
     }
  }`);

  if (loading) return <p>loading...</p>
  if (error) return <p>{error.message}</p>;
  return (
    <div className="App">
      <div>
        <h1>Name: {data.viewer.name}</h1>
        <p>Email: {data.viewer.email}</p>
      </div>
    </div>
  );
}

export default App;
Now we can see the name and Email is rendered on the screen.

Passing arguments to Queries
We can also pass arguments to the Queries let’s see an example.
Create a new file called my-repostiories.js in your src folder and add the below code.
import React from 'react';
import { useQuery } from '@apollo/react-hooks';

const reposQuery = gql`
  {
    viewer {
      repositories(first: 5) {        edges {
          node {
            name
          }
        }
      }
    }
  }
`;

function Myrepositories() {

    const { loading, error, data, refetch } = useQuery(reposQuery);

    if (loading) return <p>loading...</p>
    if (error) return <p>{error.message}</p>;
    let currentLength = data.viewer.repositories.edges.length;

    return (
        <div className="repos">
            <h2>First {currentLength} repositories</h2>
            {data.viewer.repositories
                .edges.map(({ node }) =>
                    <ul className="list" key={node.id}>
                        <li>{node.name}</li>
                        <li>stars {node.stargazers.totalCount}</li>
                    </ul>
                )}
        </div>
    );
}

export default Myrepositories;
In the above code, we created a reposQuery with an argument (first: 5) so that we can only get first 5 repositories.
Now we need to update our App component by adding a Myrepositories component.
import React from 'react';
import './App.css';
import { gql } from 'apollo-boost'
import { useQuery } from '@apollo/react-hooks'
import Myrepositories from './my-repositories'
function App() {
  const { loading, error, data } = useQuery(gql` {
    viewer {
     name
     email
     }
  }`);
  if (loading) return <p>loading...</p>
  if (error) return <p>{error.message}</p>;
  return (
    <div className="App">
      <div>
        <h1>Name: {data.viewer.name}</h1>
        <p>Email: {data.viewer.email}</p>
      </div>
      <Myrepositories />    </div>
  );
}

export default App;
Now you will see the first 5 repositories are loaded in.
Mutations
In GraphQL mutation means to update or remove or add data.
Apollo hooks package gives us a useMutation hook by using this hook we can send mutations to the GraphQL api.
The useMutation hook takes the mutation as a first argument and returns the array with mutate function and object containing loading, data, and error properties.
Now we are implementing two components Addstar and Removestar which is used to add a star or remove star to your repositories.
create a new file called addstar.js in your src folder and add the below code.
import React from 'react';
import { gql } from 'apollo-boost';
import { useMutation } from '@apollo/react-hooks';
const ADD_STAR = gql`
mutation AddStar($repoid:ID!){   addStar(input:{starrableId:$repoid}){
    starrable{
      stargazers{
        totalCount
      }
      viewerHasStarred
    }
  }
}`

function AddStar(props) {

    const [addStar, { loading, error }] = useMutation(ADD_STAR)
    return (

        <div>
            <button onClick={() => {
                addStar({
                    variables: { repoid: props.id }                }).then(res => { props.refetch();})
            }}
            > Add star</button>
            {loading && <p>processing...</p>}
            {error && <p>{error.message}</p>}

        </div>
    )
}
export default AddStar;
In the above code, we passed an ADD_STAR mutation to useMuation hook and it returns an array with mutate function, object.
The mutate function can accept the variables as an argument so that we passed repoid because we are adding a star to the repository by using its id.
Let’s create a Removestar component now.
import React from 'react';
import { gql } from 'apollo-boost';
import { useMutation } from '@apollo/react-hooks';
const Remove_Star = gql`
mutation RemoveStar($repoid:ID!){   removeStar(input:{starrableId:$repoid}){
    starrable{
      stargazers{
        totalCount
      }
      viewerHasStarred
    }
  }
}`


function RemoveStar(props) {

    const [removeStar, { loading, error }] = useMutation(Remove_Star)
    return (
        <div>
            <button onClick={() => {
                removeStar({
                    variables: { repoid: props.id }                }).then(res => {props.refetch();})
            }}
            > remove star</button>
            {loading && <p>processing...</p>}
            {error && <p>{error.message}</p>}

        </div>
    )
}

export default RemoveStar;
In this component, we are passing a Remove_star mutation to the useMutation hook.
Now update your my-repositories.js file with the below code.
import React from 'react';
import { useQuery } from '@apollo/react-hooks';
import AddStar from './addstar'
import RemoveStar from './removestar'

const reposQuery = gql`

query Myrepositories{
     viewer {
    repositories(first:5) {
      edges {
        node {
          id
          name
          stargazers{
          totalCount
         }
          viewerHasStarred
        }
      }
    }
  }
}
`

function Myrepositories() {

    const { loading, error, data, refetch } = useQuery(reposQuery)

    if (loading) return <p>loading...</p>
    if (error) return <p>{error.message}</p>;
    let currentLength = data.viewer.repositories.edges.length;

    return (
        <div className="repos">
            <h2>First {currentLength} repositories</h2>
        {data.viewer.repositories
             .edges.map(({ node }) =>
                 <ul className="list" key={node.id}>
                        <li>{node.name}
                     {node.viewerHasStarred ?                         <RemoveStar id={node.id} refetch={refetch} /> :                         <AddStar id={node.id} refetch={refetch} />                    }
                        </li>
                        <li>stars {node.stargazers.totalCount}</li>
                    </ul>
                )}
        </div>
    );
}

export default Myrepositories;
In the above code, we first imported an Addstar and Removestar components then we added it to
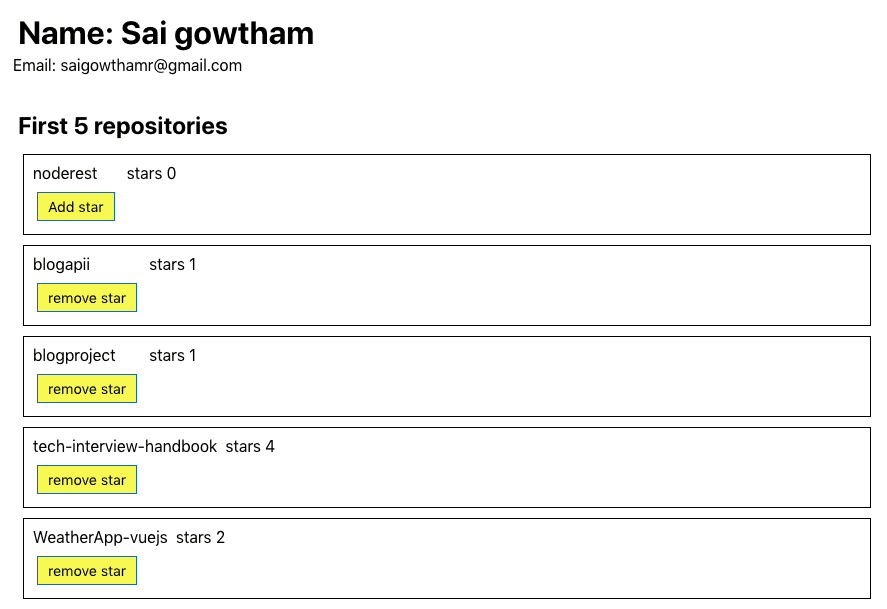
Myrepositories component with conditional rendering it means you only see Removestar component if you’re already added a star to your repository otherwise you will see an Addstar component.
Let’s see the output now.
Have you seen our UI is updated by adding or removing a star to the repository?
Code refactoring
If you look into Myrepositories component it’s already getting big and messy we can make it clean by removing all queries and mutations from our react components and place it in a separate file.
create a new file called queries.js in your src folder and add all queries we currently have.
import { gql } from 'apollo-boost'

const reposQuery = gql`

query Myrepositories{
     viewer {
    repositories(first:5) {
      edges {
        node {
          id
          name
          stargazers{
          totalCount
         }
          viewerHasStarred
        }
      }
    }
  }
}
`

const userQuery = gql` {
    viewer {
     name
     email
   }
}`

export { reposQuery, userQuery };
Now we can import queries from the queries.js file whenever they are required.
same thing we can do it for mutations by creating a new file called mutations.js
import { gql } from 'apollo-boost'


const ADD_STAR = gql`
mutation AddStar($repoid:ID!){
   addStar(input:{starrableId:$repoid}){
    starrable{
      stargazers{
        totalCount
      }
      viewerHasStarred
    }
  }
}`


const Remove_Star = gql`
mutation RemoveStar($repoid:ID!){
   removeStar(input:{starrableId:$repoid}){
    starrable{
      stargazers{
        totalCount
      }
      viewerHasStarred
    }
  }
}`

export { ADD_STAR, Remove_Star };
Now we can import mutations from the mutations.js file whenever they are required.
- Share:


