Server Side Rendering in React using NextJS
In this tutorial, we are going to learn about what is server-side rendering and how to build server-side rendered react apps by using next.js.
What is Server Side Rendering?
In Single page apps like react or angular or vue we send a single HTML file with no content and generate full HTML markup in the client browser by downloading the JavaScript files and executed in the browser.
Server-Side Rendering means the (HTML)markup we are sending to the client is generated in the server instead of in the client browser.
Uses of server-side rendering
-
Server-side apps are better for the SEO.
-
Faster page load timing.
-
Good for social media sharing.
What is Nextjs?
Next.js is a react framework which is used to build server-side rendered react apps.
Getting started with Nextjs
Let’s install the following packages by running the below commands.
# create  a new directory
mkdir nextjs-app

# changing the directory
cd nextjs-app

# Initializing the new package.json file
npm init -y

# installing the packages

npm i next react react-dom
once you successfully installed the packages now open your package.json file present inside your
nextjs-app folder and add the below scripts.
  "scripts": {
    "dev": "next",
    "build": "next build",
    "start": "next start"
  }
Creating pages in nextjs
In nextjs, we need to create a pages folder and add the required pages to our app in that folder so that nextjs will automatically create the routing for our react app.
create a new folder called pages in your nextjs-app.
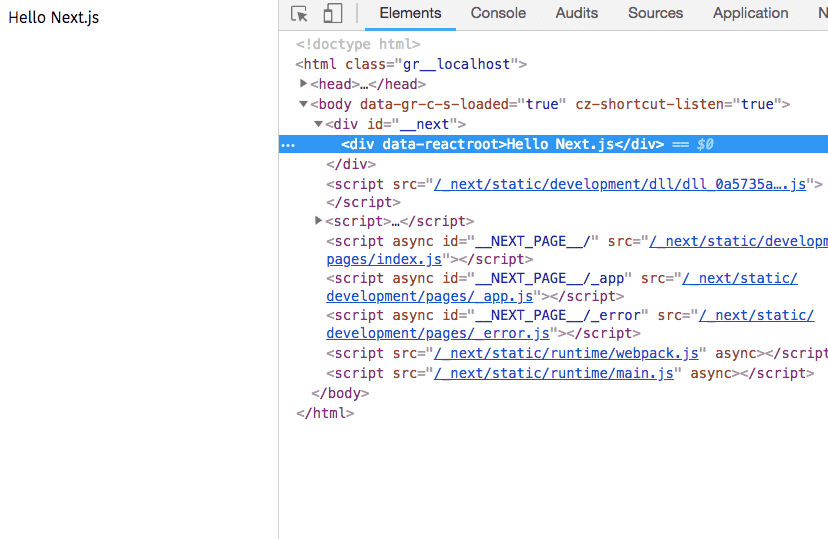
Inside the pages, folder create a new file called index.js and add the below code.
import React from 'react'

function IndexPage() {
    return (
        <div>
            Hello Next.js
        </div>
    )
}

export default IndexPage;
Now open your terminal and run npm run dev to turn on the nextjs development server.
Let’s create two more pages.
create a contact.js file in your pages folder and add the following code.
import React from 'react';

function ContactPage() {
    return (
        <div>
            <h1>This is Contact Page</h1>
        </div>
    )
}
export default ContactPage;
create a posts.js file in your pages folder and add the following code.
import React from 'react';

function Posts() {
    return (
        <div>
            <ul>
                <li>My first post</li>
                <li>My second post</li>
            </ul>
        </div>
    )
}
export default Posts;
Now open your browser and manually type localhost:3000/contact you will see a contact page is rendered on the screen.

Routing in nextjs
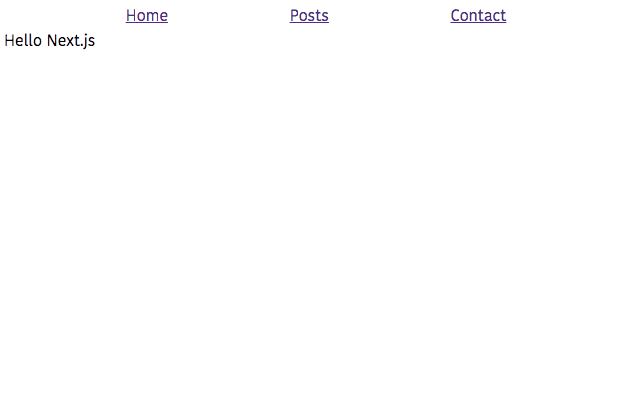
Let’s add the navigation to our app so that we can navigate to different pages easily instead of manually typing the page paths.
create a new folder called components in your app folder and create and a new file called navbar.js and
add the following code.
import React from 'react';
import Link from 'next/link'

function NavBar() {

    return (
        <nav style={{ display: "flex",
        justifyContent: "space-evenly"}}>
            <Link href="/"><a>Home</a></Link>
            <Link href="/posts"><a>Posts</a></Link>
            <Link href="/contact"><a>Contact</a></Link>
        </nav>
    )

}
export default NavBar;
In NavBar component we imported Link component from the nextjs/link.
Link component accepts the href prop to specify the which path we need to navigate.
Open your index.js file and add the NavBar component.
import React from 'react'
import NavBar from '../components/navbar';


function IndexPage() {
    return (
        <div>
            <NavBar />
            Hello Next.js
        </div>
    )
}
export default IndexPage;
Now we can see our app with a navigation bar.
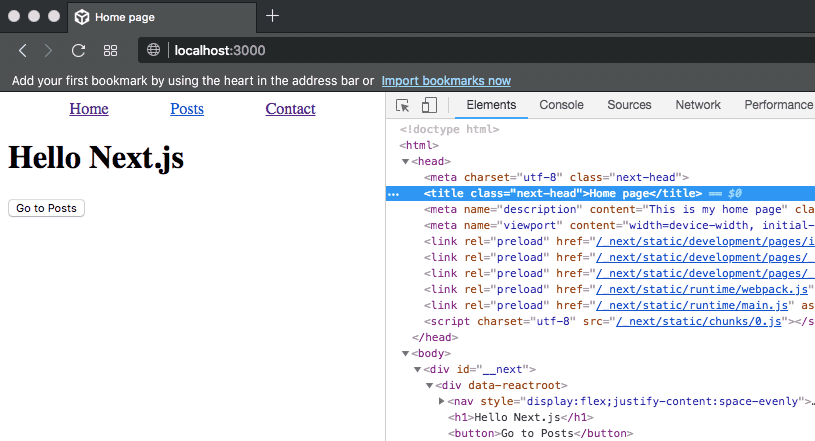
Programmatically navigate
We can also programmatically navigate in nextjs by importing the Router object from ‘next/router’.
import React from 'react';
import Router from 'next/router'
import NavBar from '../components/navbar';

function IndexPage() {
    return (
        <div>
            <NavBar />
            <h1>Hello Next.js</h1>
            <button onClick={() => Router.push('/posts')}>            Go to Posts</button>        </div>
    )
}

export default IndexPage;
Adding Seo component
So far we didn’t add any SEO related tags to our app let’s create our Seo component so that we can use everywhere in our app.
create a new file called seo.js in your components folder.
import React from 'react';
import Head from 'next/head'

function Seo(props) {
    return (
        <Head>
            <title>{props.title}</title>
            <meta name="description" content={props.description} />
            <meta name="viewport" content="width=device-width,
            initial-scale=1,shrink-to-fit=no" />
        </Head>
    )
}

export default Seo;
Here we imported the Head component from the ‘next/head’ and we passed our meta tags as a children
to the Head component.
Let’s use our Seo component inside the index.js file.
import React from 'react';
import Router from 'next/router'
import NavBar from '../components/navbar';
import Seo from '../components/seo'

function IndexPage() {
    return (
        <div>
            <Seo title="Home page" description="This is my home page"/>
            <NavBar />
            <h1>Hello Next.js</h1>
            <button onClick={() => Router.push('/posts')}>Go to Posts</button>
        </div>
    )
}

export default IndexPage;
Now if you navigate to localhost:3000 you can see our title is changed to Home page.
- Share:


